Monday, 29 December 2014

Organize Your Distress Inks and Stains

 Hello, Scrap Your Scrappers! I am so excited to be sharing my first post with you today, all about organizing your Distress products.

If you're anything like me, your thoughts turn toward getting your stash whipped into shape about this time of year, and the task can be downright overwhelming. That's why I get so excited when I come across an idea that is simple to execute and eye-appealing as well.

I'm talking about this cute, fun, and functional jewelry organizer. You can find these almost anywhere. I've seen them at Bed, Bath, and Beyond and also in department stores like Ross, Marshall's, and TJ Maxx. Of course, I was coupon-savvy and picked mine up at Michael's with a 40% off! :)


This pattern looks great with my pink scraproom walls!

This particular model has 30 square pockets - the perfect size for a regular size Distress Ink pad, with plenty of room for a foam pad in front or behind it.


 You can also store re-inkers and stains in the pockets...


 And the bottom 3 pockets, which are slightly larger, are perfect for storing your ink blending tools.

Some of my friends store their inks and foam pads secured together with a rubber band, which makes the jewelry organizer more portable for them and also prevents the problem of those pesky lids falling off.

See? Simple, cute, and functional! I hope you find this solution helpful. If so, you might be interested in something else I've created to help you avoid purchasing duplicates of your inks and stains (we want to use up what we've got, right?). It's a complete checklist of all the current Ranger Distress products. Just download and print it, check off all the products you currently own, and you're on your way to organizing your stash. It's totally FREE! Visit my blog for more information.

Till next time!

Thursday, 25 December 2014

Christmas trees, several ways

Merry Christmas to one and all.  Today is a very special day when we celebrate Christ's birth.  Part of the tradition of this time of the year though is the Christmas Tree.  This humble tree also makes it way into all things scrapbooking and so here are a few layouts to inspire you to incorporate a Christmas Tree onto your page.

First up is a journaling block... I typed up a Christmas poem an then tore around it in the shape of a tree. Matted it onto greeen cardstock which is also roughly torn in the tree shape and added it to my page.


These next two pages have trees made from pattern paper... the first one I just cut some triangles and added some trunks.  The second page the trees are cut from the patterned paper and raised on foam dots to add extra interest.


Now for something a bit more subtle, on this page the trees are from a set of rub-ons... small but just as effective.


Another idea, I used a chipboard border of trees on this page... luckily they were already green, but you can always paint or ink them to match your colour scheme.


Lastly for today, making the tree part of the page... Just a simple triangle of pattern paper and some photos strategically placed and there is your tree.


Hope these few pages inspire you to think out the box when adding a Christmas tree to your layouts.


Here is a page created for a non traditional paper Christmas challenge.  I used 2 inch blocks and triangles and built the tree. I used my Families Pictures as ornaments.


The original post can be found HERE.


Another idea:


I was very inspired by Cathy's layouts Christmas Trees, Several Ways.   I love creating layouts with the bits and scraps of paper I have left over from previous projects. When I saw Cathy's idea I knew what I would do with the scraps I had left over from a project I had just finished that were still all over my desk!


Thanks for stopping by and HAPPY SCRAPPIN'!


Sunday, 21 December 2014

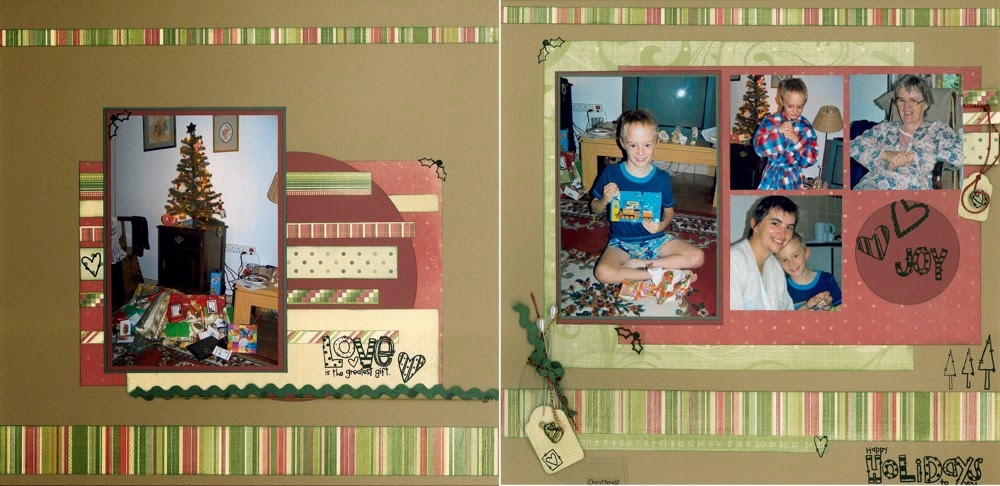
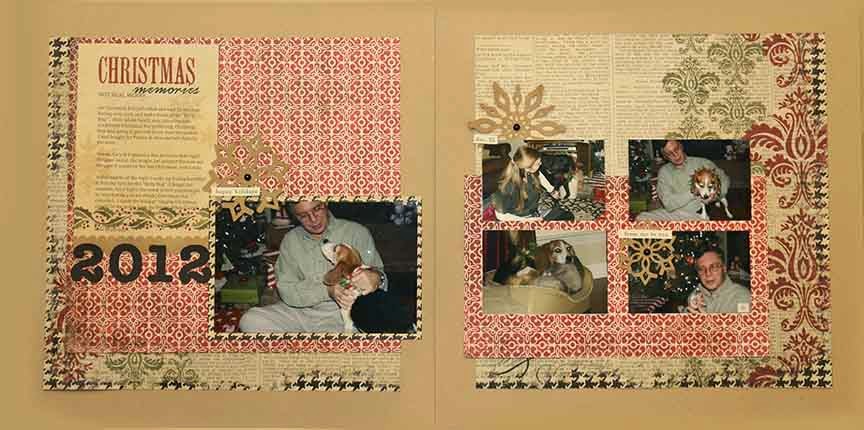
Christmas Past


I pulled out Christmas papers, but soon realized I did not have enough coordinating papers for a double page layout.

Do you ever find yourself in such a situation? I frequently do. I usually throw up my arms run to the nearest store and buy more paper. Not this time. It was getting late and I was not in the mood to battle the holiday crowds. Besides this was the year I was going to use what I have on hand. I also wanted to get in the Christmas spirit., NOW.

So this month I challenged myself.

1 double page spread, 2 sheets of patterned paper and 2 sheets of card stock and a few embellishments.


I cut my patterned paper to 10 x 10. Instead of cutting 2 inch strips, I trimmed the patterned paper into an “L” shape giving me a corner piece to work with.


The red pattered paper was “pieced together” and the pattern was matched in several areas. See if you can find them.

I challenge you to do the same. See if you can make a double page layout with only 2 sheets of patterned paper.

And have yourself a Merry Christmas and Happy Holidays!


Wednesday, 17 December 2014

Layout Backgrounds

Hi all!  Candace here today sharing with you some ideas on how to create your own background for a layout.  If you have a bunch of scraps left over this is the perfect way to use them!  You can work with papers that are from one collection or mix and match.  That is the joy of creating your own background, you get to choose!
First off is a layout that I created from a bunch of different lines.  I used a Silhouette cut file as my base and cut various scraps to fill in the spaces.  It was quick and easy.  I didn't worry about cutting the papers perfect as the overlay covered up all the imperfections.  I felt that the paper piecing added a lot to the layout so I went light on embellishments to let the background be the focus.


On the next layout I used I used a 1inch square punch to create a pattern.  I cut a bunch of squares out of a 6x6 paper pad then cut each square in half, corner to corner.  I laid out all the squares on a 12x12 base that I had lightly watercolored.  To keep all the pieces secured to the page and to add a little more interest I sewed diagonally on the page.  I love the final result!  (Now I just need to find the perfect picture to scrapbook.)


Lastly is a layout that I shared earlier this month.  I re-share this layout because I want to show you how easy it is to create a background even if you can't think of any ideas.  The idea for this background came from a 12x12 paper in the collection.  Here is a picture of the original paper.  

To create the background all I did was cut out along the lines.  Then I placed all the colored pieces of paper on another paper from the collection and stitched right down the middle of each line with my sewing machine.  The idea was right there!  


I hope this gave you a few ideas on how to create your own background for you layout.  If you have any questions leave a comment below.  Thanks so much for stopping by!


Saturday, 13 December 2014

Create Ornaments

Hi Everyone Connie Here with my first official post.  I have been making Mini albums for Christmas Presents and I have created a huge pile of scraps. Mostly strips any where from a half inch to 2 inches wide and a variety from 6 to 12 inches long. I decided to make some ornaments. They are not original ideas and have seen a variety of pictures and videos. Here are my versions.


Woven stars, and 2 different stars made with a punch.

Here are the woven Hearts. 
This one has single sided paper. I only added small pearls so you can see the weaving
The strips are half and inch by 6 inches. 


This one is used with scraps from the bases of my album Kraft card stock.
I added a snowflake from Stampin up


The third star has double sided paper and I added more embellishments burlap, wooden snowflake and a rustic star.


Here is a rustic star created by using a star punch and scoring all the points and it becomes 3D.


Here is another star with a punch. It is scored down the middle and folded in half and glued together.


All the ornaments were created using scraps.  There are so many different kinds out there. 
Have fun and breath new life into your supplies. 


Tuesday, 9 December 2014

How to Make a Card From Scraps


(In the spirit of the “use what you have” theme of this article, I’ll let you in on a little secret.  This is an updated version of an article that I wrote earlier this year.  It is so appropriate for not only this time of year, but any time you want to use up some of those scraps and “extras” that you have hanging around in your stash, that I wanted to share it with you this month.)

******************************************************************************

You know you have them.  I have them too.  We all have them.  They seem to mock us from our scrapbook drawers, bins, baskets, and paper holders.   I’m talking, of course, about paper scraps.  Yes, those leftovers from scrapbook pages, cards, and other paper projects that we just can’t bear to throw away.  We have to keep them because we paid good money for that paper, or because we don’t like to waste things, or because of a dozen other reasons.  In any case, let’s just put those little bits of loveliness to use, shall we?


Here is what you will need to make a card from scraps:

·         Cardstock cut to desired size  (I used a piece that is 4 ¼ x 5 ½ inches when folded in half.)
·         Sheet of printer paper or other scrap paper cut to the same dimensions as your card base  (In my case, it was 4 ¼ x 5 ½ inches.)  We will trim this to a smaller size later.
·         Scraps of paper or cardstock that can be cut into strips
·         Adhesive (Dry works best.)
·         Paper trimmer
·         Sharp scissors
·         Stamped image or other focal image
·         Greeting (optional)
·         Assorted embellishments

1.      Trim your scraps into strips of varying lengths.  You will want some wider than others to    create interest.  You will want them a little bit longer than your scrap of printer paper.
2.      Generously apply adhesive to your computer paper.
3.      Beginning at the top, place your strips of paper on top of the adhesive, butting them up against each other to make sure that they are straight.  The strips should overhang on each of the side edges of the paper.
4.      With scissors, trim the strips flush with the paper base.
5.      Using your paper trimmer, trim the background piece that you have created to ¼” smaller than your folded card base.
6.      Adhere the background piece to the card base.
7.      Add your focal image, greeting, and embellishments.

This is a great project to use up all those extra “things” that you have in your stash.  You can also mix in some of your new supplies to jazz things up a little.  Use some of those flair and wood veneer shapes you’ve collected; add a few enamel dots from the piles that you have stuck in a drawer; glue on a couple of sequins that you bought on sale at the craft store.
I hope this has inspired you to grab some of those leftover scraps and supplies and make a card for someone who is special to you.  


******************************************************************************

Happy Holidays, everyone!

 
   Jeanette Giancaspro


Friday, 5 December 2014

Get Inspired - 5 more prompts to encourage your creativity

Hey everyone it's Cathy M. here!  Last month I put up a post with 5 prompts to help jumpstart your creativity and get you scrapping.  This month I have another 5 prompts to share with you.  Since starting this series I have been scrapping like crazy!  I have been finding that as I come up with ideas and prompts it really helps me think creatively.  I really do like having a goal or a challenge to rise up to.  So for this month here are my 5 prompts for you to use together or seperately, whatever works for you!

Prompt 1 - Use an unexpected pop of colour

Sometimes when I'm scrapping I get into a colour slump.  There are colour combinations that I tend to be drawn towards and use over and over again.  There's nothing wrong with that, believe me, but sometimes it's fun to kick it up a notch and add a contrasting colour to a favorite combo!

Prompt 2 - Use craft cardstock or products

Craft products and cardstock has been popular for the past few years, though I feel it may have reached its peak.  That doesn't mean though that we should stop using it.  Craft is a great neutral tone to use in almost any scrap layout.  I like how it can add a pop, or create a focal point without going over the top.

Prompt 3 - Use some ribbon or fabric

I have it, you have it, we all know we have it.  Tons of ribbons or little fabric bits.  I have a whole container of them, but I never get around to using them so I decided to just go for it and add some ribbon onto my layout.

Prompt 4 - Use a favorite piece of paper

Yes that's right, use it, stop hoarding it!  I am guilty of it too.  I used to hoard so much paper, just waiting for the perfect picture to pair it with.  I have even been guilty of taking photos with certain colours in them or with a certain theme just to go with my favorite papers.  I have been trying more often to use up my favorite papers, and sometimes, yes, even cut them up!

Prompt 5 - Scrap a hard to scrap photo

This is something I do quite frequently and another habit I've been trying to break.  I have so many photos that I am just scared to scrapbook. Whether you have a hard time scrapping themed photos or aren't sure what to do with some sweet summer portraits it's time to get them scrapped.  I myself have quite a few photos that are just so sweet and perfect, but I'm not even sure where to begin when it comes to scrapping them so I have decided to just go for it.

So here is my layout using my 5 new prompts.


   Cathy Martin


I just love the way kraft cardstock looks combined with the red-and-white stripes of some of the Christmas papers available this time of year.  I decided to use a kraft base for the card below.

The striped paper is from my stash of older paper, and I think it is by Melissa Francis.  The image stamp is from Penny Black, and the greeting stamp is by Inkadinkado.  I colored the image with Copic markers and highlighted some areas with a Wink of Stella pen by Zig.  I cut the Polaroid frame and photo corners with a die made by Sizzix.

Thanks for the inspiration, Cathy!


Jeanette Giancaspro

Related Posts Plugin for WordPress, Blogger...