Thursday, 23 October 2014

Small Business Spotlight : The Crafty Pickle Flair

Today we are so excited to shine a spotlight on a great small crafty business. Taniesa Vlasak is the owner of The Crafty Pickle Etsy Store, home of amazing flair buttons and more. Yesterday, some of our contributors got to play with flair that Taniesa was kind enough to send, so go check out that post

She is also sponsoring a giveaway for our readers, so if you would like a $10 gift certificate to her store, just comment on this post as well as the coordinating post on her blog. The giveaway will close at midnight on October 31 and a winner will be announced here on November 1st.

Now I'm going to let her tell you a little about herself and then she's going to show off a few projects using the brand new designs she just released in her shop. 


Hi crafty friends!

My name is Taniesa Vlasak (yep pronounced like the Pickle) and I am passionate about all things paper crafting as you can tell by my blog, but I am also passionate about my faith, my family, and cupcakes… mmmm cupcakes!

I am a mom to 5 awesome kids and wife to a pretty amazing Husband…. whom I might refer to as the Techie Pickle, He does all my computer and technical stuff. If you have a computer question, I got your answer guy! I am completely blessed and grateful for every day.

I have been scrapbooking since 1999, I have taught various classes at a few local scrapbook stores in the bay area along my journey. I am hoping for some pretty amazing things in 2013, new opportunities hopefully and meeting new friends!

Right now I am passionate about the project life style of scrapbooking. This has kept me mostly up to date with memory keeping right now and I used to be really bad about journaling/documenting the important things in my families lives. Sometimes you will find I keep my pages very simple and sometimes I like to be a little more artistic, You will also find other various paper crafting projects from me as well as product reviews, tutorials, and organization tips.


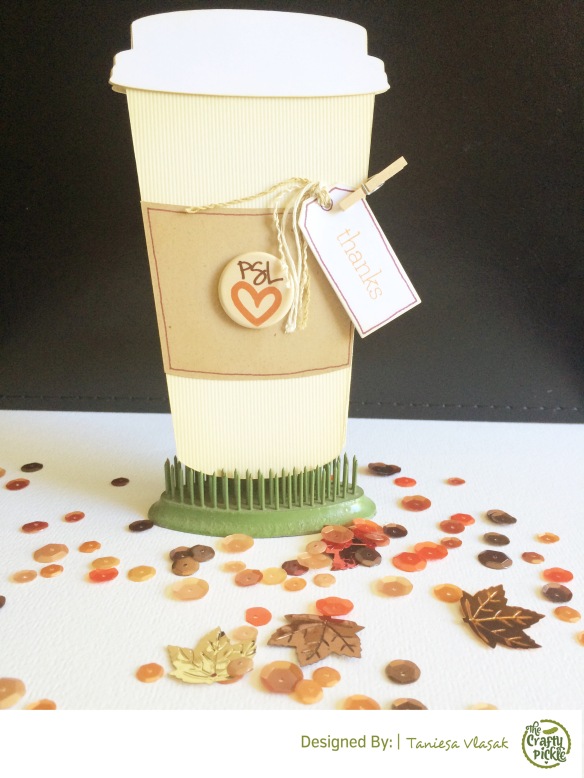
I wanted to share two different ideas using some brand new Flair that I just added to The Crafty Pickle Etsy Store. First up is a thank you gift card holder that I made using my silhouette and a flair from the Cozy Fall Set. I adore Autumn and pumpkin spice latte's are my favorite!

Coffee Gift Card @TheCraftyPickle.com
 

I used some cardstock I had on hand and cut out the card design on my Silhouette using design #
29511

Coffee Gift Card @TheCraftyPickle.com
 

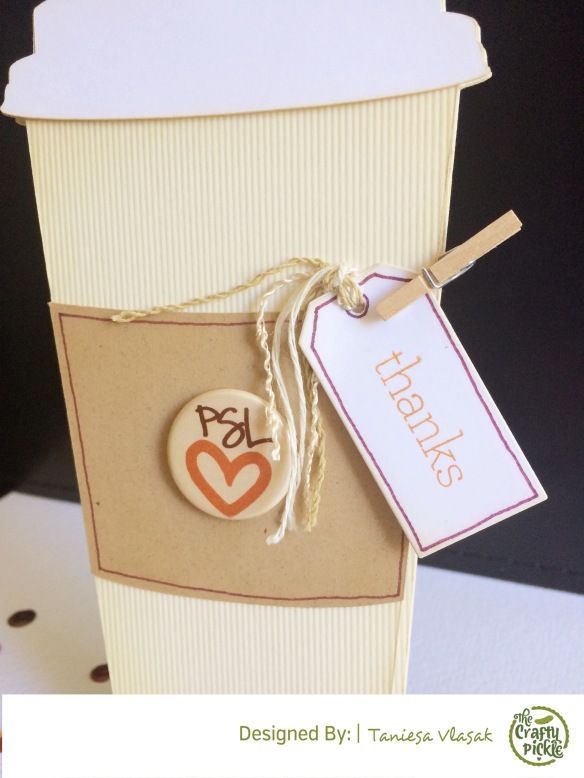
I die cut a tag from some cardstock scraps I had, added a little bit of decorative trim and attached it with a little clothes pin. I attached the PSL (pumpkin spice latte) button with some tombo xtreme adhesive. You could also use a button from the Starbucks flair set too, I just wanted to go for an autumn feel with this card.
Coffee Gift Card @TheCraftyPickle.com
 

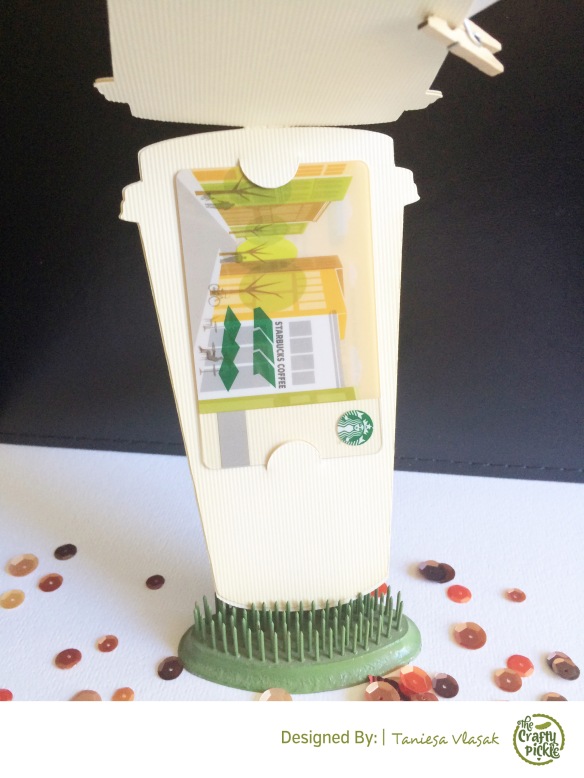
 The inside has room for the coffee gift card as well as a little room to write a personal message.

Coffee Gift Card @TheCraftyPickle.com
 
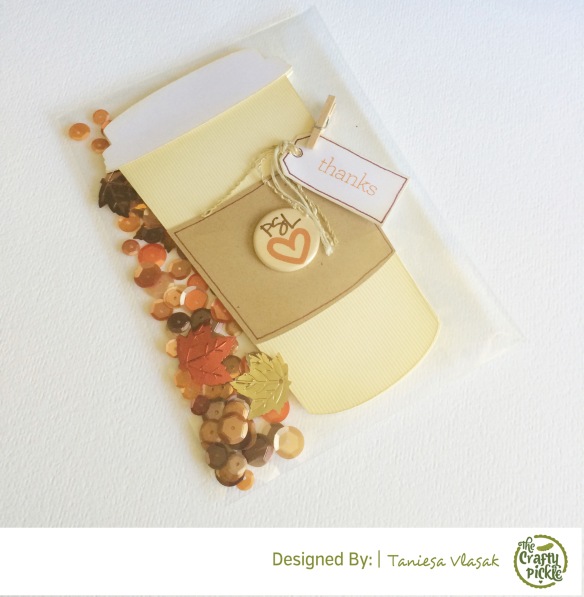
Once it was all finished I slipped the card into a clear envelope and tossed in some of the exclusive autumn mix sequins from The Crafty Pickle Etsy shop for a little added fun touch.

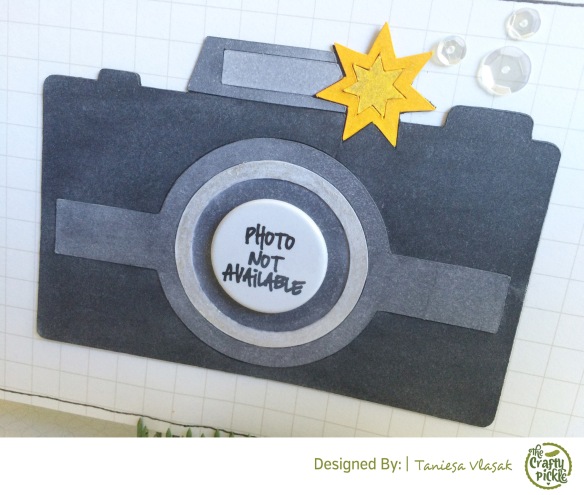
Next up I have a project life card that I am sure anyone can find use for in their album, Mine is usually inspired by one of my teenage boys dodging the camera. For this card I am using the Photo Not Available flair from the Everyday Photo #2 set.

No Photo Available Project life card @TheCraftyPickle.com
To make this card I took a white piece of heavy cardstock that was in my scrap pile and cut out the camera design on my silhouette (Design #41015) The design called for several shades of gray but I only had two shades on hand so I just cut everything out of the white cardstock and colored the pieces with my copic markers (N8, N6, N4, N2, Y15, and Y19) I also used my wink of stella glitter pen and my Stardust gelly roll pen by Sakura 

No Photo Available Project life card @TheCraftyPickle.com

I attached a few sequins (that are always included in my flair packages) and attached the Photo Not Available flair with some Tombo Xtreme adhesive. The base card is a Becky Higgins Project Life grid card.

No Photo Available Project life card @TheCraftyPickle.com

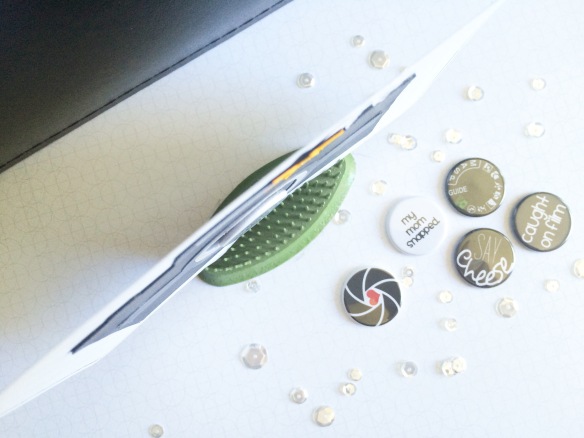
As you can see above my flair has a very low profile making it ideal for page protectors of all types, especially pocket pages. It's about the same dimension as chipboard or thickers.

If you haven't visited The Crafty Pickle Etsy shop recently you might be surprised to find over 30 new flair sets including our new color patterned pop collection and some special limited edition 
sequins mixes.

Happy Crafting!
  The Crafty Pickle

Wednesday, 22 October 2014

Small Business Spotlight: The Crafty Pickle

Do you know the Crafty Pickle, the creative shop with wonderful button flairs?

http://thecraftypickle.com/

Taniesa Vlasak is our guest today, for our small business spotlight.
All of her button flair is handmade by her, and she can even do custom orders, take your own designs and make them into buttons, or even change colors on some of her existing designs!

Let's see what our creative team did with them...


Hello Everyone
I created this layout using some amazing flairs that I received from Taniesa Vlasak.  She was kind enough to send these (plus some others that I will use in another layout very soon) fabulous flairs from her Etsy shop - The Crafty Pickle.  My flairs that I used for this layout were all about cameras and sayings around taking pictures so I knew that I wanted to use these pics of my daughter.  All other products used are Lawn Fawn.


I want to thank Taniesa for these awesome flairs for me to use.  You can visit her Etsy Shop The Crafty Pickle and purchase some absolutely awesome Flairs to use on your next project.

Thanks for stopping by and HAPPY SCRAPPIN'!


   Mandy Reedyk


Hey everyone, Cathy here.
Have you ever made an entire layout based on an embellishment?  Well I made two.
This month we are featuring the amazing Crafty Pickle Flair at Etsy.  Taniesa Vlasak has an amazing shop and I absolutely love her unique flair badges.  She sent me some terrific buttons and I picked two that immediately caught my eye and just couldn't help making layouts around.


My second layout is inspired by a design by Ashley Horton:


   Cathy Martin


Thanks to Taniesa and The Crafty Pickle
I hope our creative team inspired you for using your flairs, and if you don't have any, well, now you know where to buy some, don't you?

Sunday, 19 October 2014

Using stamps to match a collection's leftovers

Hello everybody!

Have you ever kept scraps from a collection that you loved, but without using it because you had not enough left? Or have you ever sighed after your unused stamps and inks, without ideas about how to use it on your projects?
Then, these ideas are for you!

I love to match stamps with leftovers, because it helps me to stretch a collection's scraps (I usually only buy a few sheets from a collection) AND it makes me to finally use my inks and stamps...  I should do it more often!

I usually start with a multicolored pattern from the collection, and I look for inks with this color palette. Then, I look for stamps that match well (here, flowers and leaves were a good option)


The easiest way is to use a small stamp several times on a strip, like I did with the dark blue flower on the card below. (I also used watercolor pencils to color it).


  Solange-Isbaha 


Wednesday, 15 October 2014

Let's Make A Pinwheel!


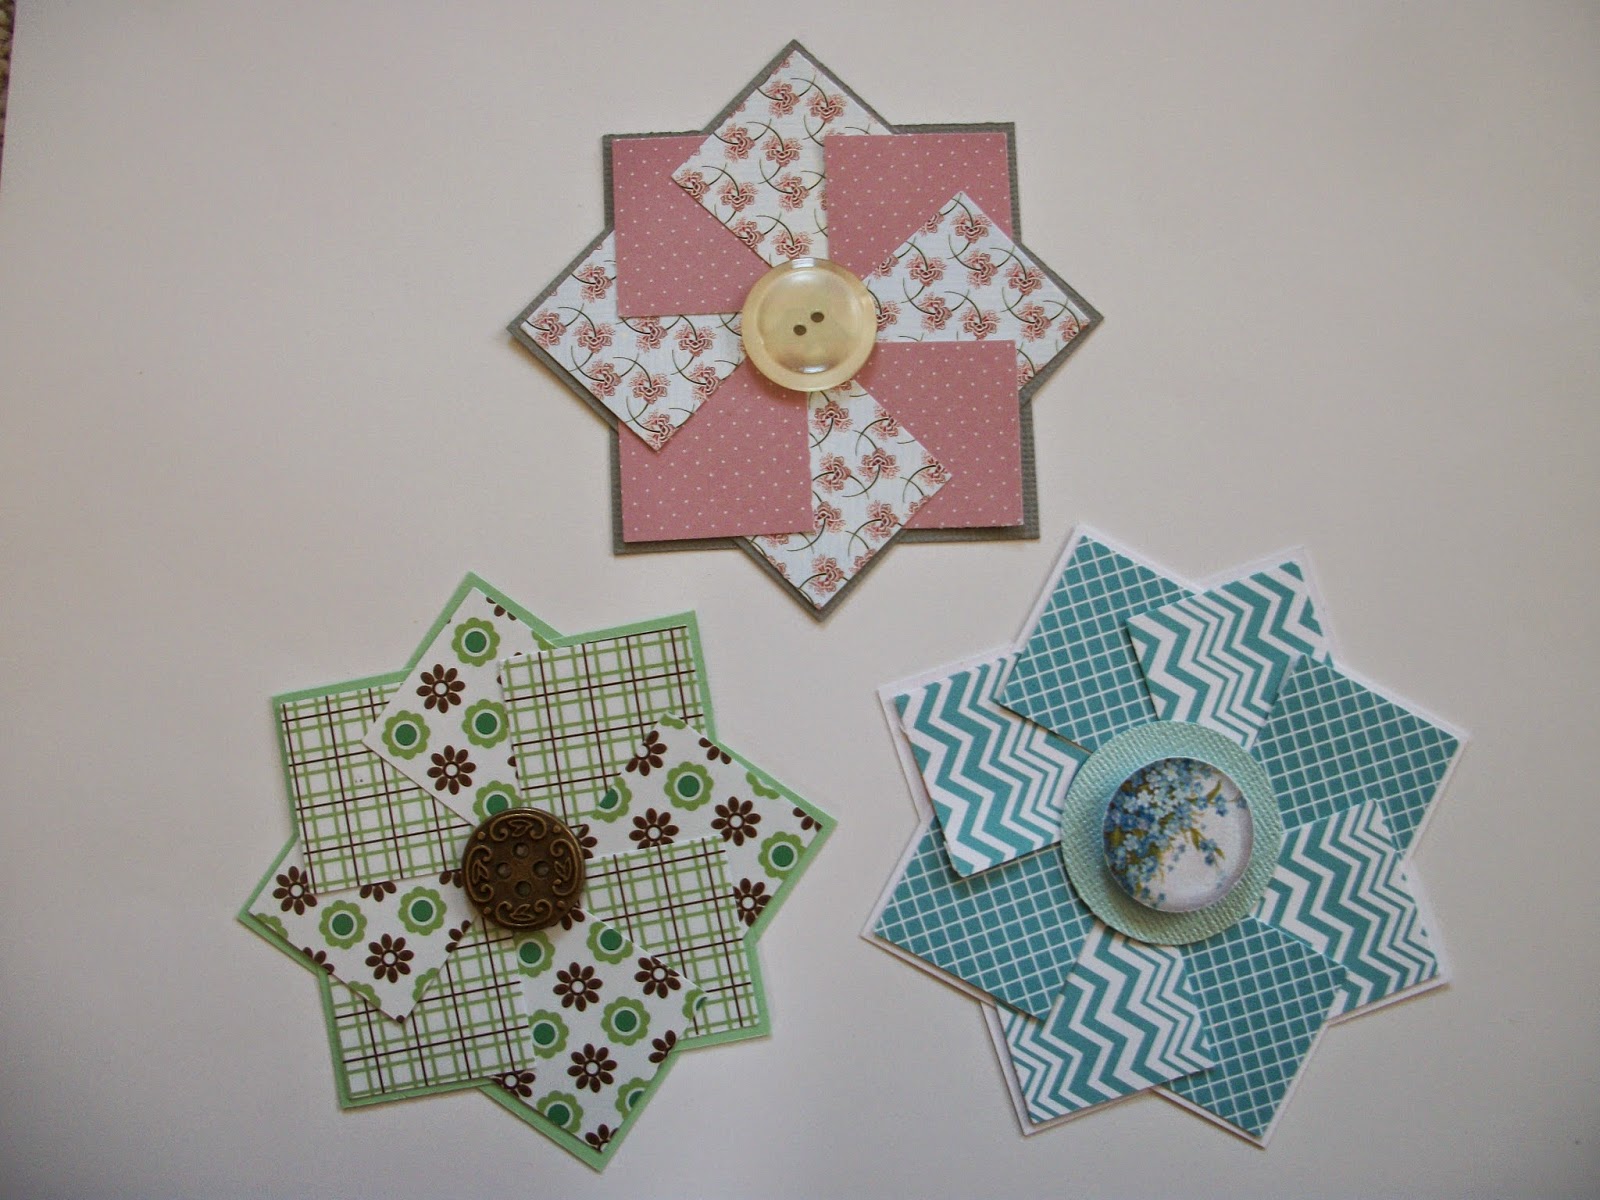
One day I was sitting at my computer doing one of my favorite things ~ a Google search of “how to use paper scraps.”  I found a fun pinwheel pattern tutorial and decided to give it a try.  I loved the results and have used several of these for card fronts.  They are so easy to make and you can use your scraps! 

You need 2 squares of plain-colored card stock measuring 2 5/8” x 2 5/8” to use as the foundation for the pinwheel.  Then you’ll need 8 squares of card stock or paper measuring 1 ¼” x 1 ¼”.  The squares can be hand cut or punched.  It’s best to use two different patterned papers for the smaller squares or you could even use a solid color with a pattern as long as it’s a contrasting color from the foundation.  Make sure to look through your scrap bin for those perfect scrap pieces. 

So here are my supplies for three different pinwheels. 


Take your two squares of card stock and overlap the squares diagonally. 


Apply adhesive to just the corner of one of your punched squares and place as shown.  The corner with glue should be on the outside point. 


Using a contrasting pattern, adhere the next piece of paper.  Continue until only one square remains.  Tuck the final square behind the first square to finish your pinwheel.  


That’s it!  See how easy that is?   Finish off the middle with an embellishment of your choice.  I chose a button for two of them because I have so many right now, but you could use a brad, a sticker, a punched circle ~ whatever you think would complete your pinwheel.  On the blue one, I used two different sized punched circles with a pop dot to give it some dimension. 


Here's a birthday card I made using one of the pinwheels:


 To make things even easier, I keep a stack of 2 5/8” x 2 5/8” squares and the 1 ¼” x 1 ¼” squares in a small container to have on hand and ready to go when I feel like making these.  So far I’ve only used them on cards, but I know they would look awesome on the right scrap booking layout, too. 

Thanks for stopping by.  I hope I’ve inspired you to use those scraps!


   Sandi Chromey
     Creative Team Member of SCRAP YOUR SCRAPS 


Sunday, 12 October 2014

About inspiration!

Hey everyone, Cathy here. For my layout I was inspired by this picture I found on Pinterest.  It was originally found at www.clumsycrafter.com.


When I saw this cute painted heart technique I just knew I could replicate it on a scrapbook page.  For my heart I used a pencil as well, but I used a gold ink pad, because lets face it, gold is definitely a thing right now, and I am all over it!  Here is my inspired by layout.


   Cathy Martin

Thursday, 9 October 2014

Guest Gina Huminski (GinaBeth1) : Melding Old and New

Hi everyone, Tiffany here to introduce a guest blogger today. Her name is Gina Huminski, but you may know her as GinaBeth. She is one of my very favorite people to watch on YouTube, and she never fails to inspire me. I have always loved the way she uses her stash, mixes product, and follows the rule to do what looks right to your own eye. I was so excited when she agreed to do a post for us!
You can find more of her work on her blog and her YouTube channel.

  Tiffany O'Grady
   Creative Team Member of SCRAP YOUR SCRAPS 


I think any time someone approaches you and asks you to share your work with a group of their readers, it can be a very humbling experience and yet also terrifying.  When Tiffany asked if I would like to contribute a blog post to this blog, I was over the moon excited, but at the same time, wondered what I would like to share.  Tiffany gave me total control over the content, but she did mention something to me that stuck.  She said that one of the things she likes most about my scrapbooking is my ability to meld old and new product.  As I thought about this over the last few weeks, I started to wonder why that would be something that someone would notice.  Here are my tips if this is something you struggle with:

1.  Don’t keep up with the Joneses.  We all look at the layouts that are posted in the social groups to which we belong and we all have that one scrapbooker that we wish we could be.  His or her layouts are always inspiring and something that we would like to achieve.  Let me be the first to tell you, that’s okay, but let me also tell you that just doing your own thing is okay, too.  These are your memories that you are preserving.  You don’t need anyone’s approval on how you do it.  The great thing about scrapbooking is that it’s all about you; there are no rules.  So feel free to put whatever you want on your page, try whatever technique caught your eye because at the end of the day, the only person who can turn a critical eye to your work is you.  So if you like it, embrace it and move on to the next page.  It’s only paper!

2.  Don’t keep track of trends.  When we look back on our memories twenty years from now, we’re not going to remember that during the Summer of 2014 every one was into watercoloring or that enamel dots were the hot thing or that gold was everywhere.  We’re going to see pictures; we’re going to read journaling and we’re going to remember those stories.  So if you want to meld your old product with your new, remember, that trends come and trends go and sure enough, they also come back.  Has every one noticed the reprisal of tear bears?  I rest my case.  It really goes back to what I stated in point #1.  Do what makes you happy.

3.  Put your supplies away.  One of the reasons why I don’t realize that I’m mixing old and new products is that I don’t keep track of what is old and what is new.  I order new stuff and I put it away so that when I’m in the middle of a page and I think to myself, ‘oh, I need one of X’, I know where it’s located.  Whether I pick something that I bought last week or something that I bought three years ago doesn't matter.  If it fits on the page, I use it.

So that’s my three thoughts on melding our old and new product.  Let me share with you now the layout that I made for this blog post.
When I began to think about this concept of using old and new, I started to look around my room at all of the supplies that I have amassed over the years.  I decided right away that I would do a monochromatic layout.  It’s much easier to pull supplies that way.  This was a departure from my normal process.  Typically, I start with the pictures, but this project was more about the supplies, so I started there.  I decided that I don’t scrapbook with the color purple very much, so I would try to do a monochromatic layout in purple.  I pulled all of the supplies I thought I might want to use.  Again, since all of my supplies are put away regardless of their age, I didn’t know that I pulled a set of brads from 2005 and a set from 2014.  I didn’t end up using any of brads – but this is what my supply set looked like to start.


Next it was time to find some pictures that might go with this purple theme.  I have a large stack of photos from the beginning of 2014 already printed.  I searched through those and found this photos of our night attending Cirque Ziva.  The pictures had purple in them.  I was on my way.


Then, I began to think about new.  I had a lot of supplies next to me, but in looking at the rhinestone and glitter flowers, the brads, the eyelets, and all the rest, none of it screamed new.  So if my supplies aren’t new, then I would embrace a technique that is very popular right now.
Using a Heidi Swapp stencil, some Pearl Mica Flake medium from Ranger, and a sheet of Glitz pattern paper from 2009, I created my background.


Following that, it was time to figure out where the pictures were going to go, find a place for my title, determine what my journaling was going to say and where, and then embellish.
Using the older supplies and the newer technique, this is the final product.  I absolutely love it. 


The title is made from old Heidi Swapp Alphabets called Schizophrenic in Lilac.  They were released in 2005.  I didn’t like the light color of them so I colored over them with my Wink of Stella brush pen in violet.  The rhinestone and glitter flowers are just from my stash as is the large flower.  That flower came in a kit many years ago.  I added some puffy hearts that are more recent from Freckled Fawn along with some metal hearts from this year.  They are by My Mind’s Eye, Necessities collection in metallic.  The doily I purchased from a shop on Etsy.  As the finishing touch, I took a page out of Nancy’s (kittyscrapper) playbook and used phrase stamps from Amy Tangerine, Dear Lizzy and October Afternoon to finish off the layout.  The journaling was done using a Staedtler Triplus Finepoint marker.

I hope that through sharing this, you have been even a little bit inspired to get to your workspace and start capturing your memories.

Take care and thanks again ladies for inviting me to contribute.  Gina


Saturday, 4 October 2014

Contributors CALL!!

Hello everybody!
Here is the big new: a Contributors Call! 
Tiffany and I are so excited to discover you, and we hope that YOU will apply!

DT call

What inspires you ? How do you manage to use what you already have ? If you want to share your best ideas, your best links and your best projects with us (layouts, cards, mini albums...), don't be shy and apply for this contributors call!

Edit: Someone asked if using scraps only was a requirement. No, it isn't (even if it's the name of the blog!).  
We actually have lots of categories on the blog: stash organisation, use your scraps, one item three ways, something old and something new, inspired by (another scrapbooker, a sketch, a technique, something in our stash...) and DIY, and we don't use scraps all the time, as you can see.
Contributors freely choose which category they want each month (that's why some categories are fuller than others). It's really open...

It's more about using what we have, old or new, including using scraps but absolutely not all the time. Sometimes, using something brand-new is also a challenge!

Send us a message before the end of the month (see the contact form on the side) telling us why you would like to take part to this blog, and where we can see your work (blog, gallery...). No previous experience needed.
You will be asked to write one blog post by month (with your project), and to make a project for one other contributor's blog post from time to time (at least twice during your 6 monthes term; you can participate each month if you want but it's not a requirement).
The contributors term will be from December 2014 to May 2015.

And if you love this blog but don't want to contribute, you can still follow us on Bloglovin, Facebook or Pinterest!


   Tiffany and Solange-Isbaha
   SCRAP YOUR SCRAPS Administrators
Related Posts Plugin for WordPress, Blogger...