Saturday, 28 June 2014

Layouts - Mixing Old with New

Hi everyone!  I'm so excited to share with you today my thoughts about mixing older products with newer when creating your layouts.

If you are like me at all, you have quite a stash of products.  I have, in the past, been guilty of hoarding my newest products for just the right project.  The problem with that, of course, is that the "right project" just never comes along.  In the past couple of years, I've gotten over the fear of using up my newer products.  That's what they are there for, right???  So, that leaves me (and probably you too!) with the dilemma of what to do with those products you've had for 2, 3, maybe even 5 years or more.

So, one thing I've done is challenged myself to use at least one older product on my more recent layouts.  For this layout, most of my products were at least two years old, but I wanted to make sure to incorporate products I've acquired in the past 6 months or so.

I had this precious picture of my niece working on one of her water color masterpieces and had not yet gotten around to scrapbooking it.  I used to colors in the photo to choose a variety of background papers and embellishments.


I chose several older, but brightly colored papers from Bella Boulevard and one much more recent chalkboard style paper from Crate Paper to offset the vibrancy of the other patterns, knowing that I would be doing some layering.  Some new clip embellishments, a chipboard frame, and die cut picture from Crate Paper, along with some more recent envelops from Studio Calico and an older flare pin and more colorful offerings from Bella Boulevard rounded out my product.  I also just received a big bag of cute buttons that I wanted to include somehow.

I knew when I started, I probably wouldn't be using all of these items on my actual layout, but if you want to try this process, I suggest pulling out more than you are going to use just so that you give yourself some options!

Here is the finished product with a mix of older papers and embellishments with a splash of some new!  The letter stickers are also a few years older.


Thanks for reading and I hope you have been inspired to create using older items from your stash!

  Deedee Horton
  Creative Team Member of SCRAP YOUR SCRAPS


Wednesday, 25 June 2014

Pull-Out Pockets for Interactive Scrap Booking Pages


Hi Everyone!  

This pull-out pocket idea was inspired by Christy Harriman.  I saw one of her youtube videos and really liked the idea of having interactive scrap booking pages.  Her video inspired me to create some of my own, and I'd like to share this idea with you.  These pocket pages can be used for hidden journaling, pictures or whatever you'd like. 

I created these for my Christmas book which is a 6x8 SNAP album. I used some red and blue Christmas paper for the pockets and then added some embellishments using scraps from my stash.     
 

These were created for my Hawaii vacation book which is also a 6x8 SNAP album.  The papers I used for these would have been fine just as they were; but, again, I wanted to use some of my scraps.  So I added some embellishments and word art to coordinate with the colors of the pull-out sheets.  There is coordinating paper behind the pocket.  So when it's inserted into your book and you flip the page, it looks just as good on the back.  You could also add more journaling or pictures.


When I insert them into my SNAP album, I just punch holes in the side. This shows one of the pocket pages inserted into my book.  You can see how you can add just about anything you want to the pull-out sheet.


The pocket doesn't have to open on the side.  Here is one where I wanted the pocket to open at the top. I added one of our vacation pictures to the front and the back.  The pull-out sheet has my journaling for the day with another picture behind that.


Constructing the pocket and the pull-out page is relatively easy.  The fun part is embellishing it, using your scraps, and making it your own.  Take two pieces of heavy card stock and cut them to your desired size.  This will depend on the size of the album you will be inserting them into.  Take your circle punch and punch half a circle on the top piece of card stock.  In this example, I used a 1" circle punch.  Run your adhesive along three sides.  The open side will be where you insert your pull-out sheet.  The size of the pull-out sheet will depend on how wide your adhesive is.  So you may need to experiment with this to get the right size.  You want to make sure it slides easily in and out.    


It looks pretty plain so far.  The fun part is making it unique by adding your own embellishments and finishing touches.  This is where your scrap bin or stash comes into play.  Take a look and see what you might have to dress up your pocket page and pull-out sheet.  I added a 4x6 card about summer, some circles, word art and other little scraps of color here and there.  This is the finished product.  I just love how it turned out.


If interactive scrap booking pages just aren’t your thing, you might want to consider using the same concept to make gift enclosure cards.  I made one here that measures about 3x5.  It would be perfect for enclosing inside a gift.  You have the envelope and the card all ready to go.  Just add your own sentiment on the inside and/or outside to personalize it.


I hope I’ve inspired you to create your own pull-out pocket pages or maybe even gift enclosure cards.  Thanks for stopping by and happy scrapping! 


  Sandi Chromey
  Creative Team Member of SCRAP YOUR SCRAPS 


Saturday, 21 June 2014

Ink & stencils backgrounds

Today, we are glad to have another talented guest: Audrey/Doudinette. I did my best to translate her post, here it is:


Hello !!
My name is Audrey, better known as Doudinette. I live in France, in the Champagne region, near Reims. I am 30 years old and I am the mother of three kids (Axel: 9 years old, Romane: 6 years old and Mathilde: 2 years old) who are obviously my main inspiration. I have been scrapbooking for 8 years and my style can be called "clean", even though I like to get slightly messy. I am also a fan of photography. I especially love to take my kids' portraits, and then use them on my layouts. Thanks to digital cameras, scrapbooking is mostly a way for me to develop the "better" photos and keep memories for my children.
I haven't always used stencils on my layouts, but since I've tried them, I can't do without them. 
First, I use removable spray glue so the stencil sticks to the background. I suggest that you stick the stencil first on a scrap paper once or twice, to get rid of excess glue and to make sure that you won't get your background dirty.

 Now, here are 3 techniques I use on my layouts:

- I use either a piece of cut-n-dry (link) or a dry wipe that I lightly ink. Don't worry if you don't have any Distress ink, any dye ink like Florilèges Design (a french brand) can do the work! Then I rub the ink slightly with circular motions without pressing too much. If you want your color to be darker, you can repeat several times.


- Another technique is to color some gesso with liquid inks like Izink (a french brand by Aladdine). Then I use an old gift or credit card: I take some gesso with the edge of the card and I apply it by sliding the card over the stencil. Feel free to make your pattern iregular, the result will be even more beautiful.


-  My last technique is to press my ink pad on a craft sheet (or on the lid), and then I add some water drops. With a thick brush, I tap on the pattern. The result has a watercolor look.


 Thank you very much to Isbaha for her trust!


  Audrey-Doudinette
   Guest contributor for SCRAP YOUR SCRAPS 


Hello Everyone

Today I'm sharing a layout I was inspired to create when I saw Audrey's layouts.  I used my mists and my Heidi Swapp Sunburst Stencil.  I really didn't know what I wanted to do but just play around and see what it would look like using my Primrose Heidi Swapp Shine Mist with the Stencil.  This photo has been on my desk for a while waiting to be scrapbooked.  It's one of those things that wasn't planned but as I was cleaning my desk this photo ended up on top of the misted page..... I also added some stitching to this layout as well to add dimension without a lot of bulk.  This is what I ended up with... :)


Thanks for stopping by and HAPPY SCRAPPIN'!


  Mandy Reedyk
   Creative Team Member of SCRAP YOUR SCRAPS 


I've always loved Audrey's backgrounds, so I had to try that!
I used my tries to make cards backgrounds (I think they could be nice cards for a wedding, couldn't they?).
Even if I do like my cards, they aren't really "me" (they are definitely inspired by Audrey's style!), but I don't mind, because I learnt something, and now, I will try to get this into my own style... So don't be afraid to give it a try, maybe you will find a way to make these techniques "yours"!


 I did a short video about how I tried Audrey's techniques for my cards' backgrounds:


  Isbaha
   Creative Team Member of SCRAP YOUR SCRAPS


Thursday, 19 June 2014

Scrap to Your Hearts Content - Using Your Scraps to Make a Cute Background!

So here is my first blog post as a creative member of the Scrap your Scraps team, hope you enjoy!

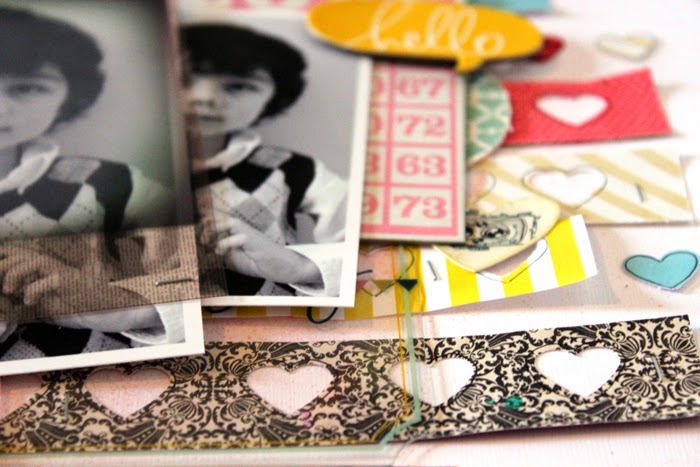
For my first layout here I decided to tackle using some of my scraps to design a fun background.  I have a tiny heart punch that I rarely use, so I thought I would give a try at making a ton of tiny hearts to spread out over my white cardstock.


After choosing several scraps of paper that I felt went together nicely I began punching multiple hearts from each.  For this project I choose smaller scraps of paper since I so rarely use up those tiny ones.  Even just strips of leftover paper work well for this too, and of course, any other shape would be awesome!  I used several scraps from 6x6 paper pads, which are great since the patterns for those are sized down.


So my original idea when starting this layout was to lay out all my hearts in a grid pattern almost creating a patterned paper.  I really do like this effect, and I toyed with removing hearts from the pattern in various places, just for another subtle effect.  I really do like this, but as I was laying it out I kept glancing over at my left over strips of paper with the negative heart cutouts in them.  I was really digging the look of them, and I also wanted to do some watercoloring on the background too, so I thought about how to combine them.


Here is where I had some lovely trial and error!  First, did you know that Heidi Swapp Color Shine mist does NOT mix with water?  Well I didn't, but after I attempted it for the background I found out.  I really wanted a watercolour effect for this, but of course, my watercolours were no where to be found!  After searching my tiny (extremely messy) scrap room with no luck I gave up and just misted some peach mist on the cardstock. I was digging this look, so I started laying out my strips of paper.  My hearts are in no way evenly spaced, and some papers are longer/shorter or wider than others, but that's the point right?  So after I laid these out I stapled them down with my Tim Holtz Tiny Attacher.  I left lots of space between staples so I could pull them up and bend them so they looked more crinkly.  I also outlined each heart punch out with a black pen, just to have them stand out more.  I then decided I still wanted to use up some of my heart shapes too, so after outlining them in black  I glued them beside my strips of paper. 

And now for the final product, since I forgot to take any more photos!


I love love LOVED making this layout!  I had so much fun creating this, and it was very enjoyable to start a project with at least somewhat of an idea of what I wanted for a finished project.  I hope I've inspired you to dig out your scraps and your punches and go to town!

 
Cathy Martin
Creative Team Member of SCRAP YOUR SCRAPS


I was very inspired by Cat's layout.  I love creating layouts with the bits and scraps of paper I have left over from previous projects.  If there is a line of papers I fall in love with I want to make sure that I use every little bit of them up and it's usually the layouts that I feel happy and content about when finished.  I thought I would share this layout in which I have only used scraps.


Thanks for stopping by and HAPPY SCRAPPIN'!


   Mandy Reedyk
   Creative Team Member of SCRAP YOUR SCRAPS


I was working on this layout and wanted to work some circles into it because of the polka dot background.  So I punched some 1" circles to use, which left this piece of paper with the negative circles punched.  I thought, hmmm, that reminds me of Cat's idea which she used for her post with the hearts.  So I worked it into the layout and really like how it turned out.  I wonder how many times we've thrown away these pieces of paper because we thought we were finished with them and didn't realize what a great addition they could make to our layouts.  Here's the layout I made.  I even tucked a little journal tag behind the picture to pull out.  

  
I love how Cat worked the hearts and the negative pieces of paper into her layout and definitely want to try her method again using more of the negative space pieces. Thanks for the inspiration, Cat!


  Sandi Chromey
   Creative Team member of SCRAP YOUR SCRAPS

Monday, 16 June 2014

Revisiting Older Products in Your Stash

Hi - Nicole here waving to everyone!!!  This is my very first post for the Scrap Your Scraps blog and I'm super excited to be here with all this amazing talent going on!

Today I would like to talk about something very near and dear to my heart - older products in our stash.  I know, it's not a trendy thing to discuss.  Most of us all see the new releases throughout the scrappy seasons and our hearts go pitter patter and our wallets cry out for mercy (or at least MINE does with Simple Stories...but that's a whole other blog post... lol ).

I'm sure many of us can remember trips to our local scrapbook stores or big box stores and finding ourselves oohing and aahing over the beautifully displayed NEW products.  Grabbing two sheets of every paper in a line, and of course every. single. embellishment.   Fast forward a few years - and those products are still waiting for the "perfect" page or project to magically happen.  I don't know about anyone else, but I have recently found myself embracing the freedom of older products.

I would challenge anyone reading this to take a trip down memory lane in your stash and revisit items or collections that you have been holding on to for some time and look at them with fresh eyes and ideas.  Let go of the idea of the "perfect page/product" and use them NOW.  (As long as you still love these products of course, I recently sold a lot of stash that I was no longer excited about).

I'm going to share a few pages that I have done in the last few months with older products; things that have been out for awhile and are not the latest lines available.

For this double page (sketch from Scrapbook Generation), I used an older collection pack by Echo Park - and I'm not sure how old, but I bought it at a convention and those never have recent releases - at least the ones that come through my town...

I also paired the papers and stickers up with tons of older stickers and some ribbon from my stash.


For this single page (sketch #318 from Nuts about Sketches), I used older Bella Blvd halloween collections and stickers - these came in a warehouse box from 2013 so I know a few of the papers are pretty old!


Here is the process video for this layout:


Since I already had all the Bella Blvd halloween stuff out, I grabbed some of the Witch Hazel collection by October Afternoon (also from a warehouse box/santa sack = OLD!) and created a double page (sketch #319 from Nuts about Sketches).  


For this one - I did use newer papers that came in my monthly kit from 3 Scrappy boys, but I paired it with a LOT of older embellishments from my stash.  I love mixing new and old together.  It's a nice surprise to find older things in my stash that I still love, am inspired by AND they work well with newer items.


So go and check out your stash and try to find some older products that you may have forgotten about or have been saving for something "special" that just didn't happen - and make SOMETHING, ANYTHING, just use those older supplies and enjoy the process!


  Nicole Bingaman
   Creative Team Member of SCRAP YOUR SCRAPS


I loved that Nicole went back and revisited some of her old supplies and I decided that I needed to do the same.  A little backstory,  I have only done one major online order since starting scrapbooking, and that was in 2010.  I don't really have the money or access to buy new products all the time :(  but I do work at a store that sells scrap supplies, so that is where I pretty much get all my supplies from, although they're not new releases or anything, so I guess what I'm trying to say is I have A LOT of old supplies, that I just never use. 
 

 For this layout I went back to an older collection from Cosmo Cricket called Nutmeg.  I loved it when I bought it forever ago but never found the right layout for it.  I used it for the small scraps behind the pictures, and used some stickers from the same collection, and I used the Basic Grey Konnichiwa line for the background paper.  The bows and owl embellishment are new, and the leaves are old. . . VERY old. I am loving this layout and can't wait to break out more of my older stash and get scrapping.  Thanks so much for the inspiration Nicole.


   Cathy Martin
  Creative Team Member of SCRAP YOUR SCRAPS


Related Posts Plugin for WordPress, Blogger...